Our themes provide a Layout Builder to create the footer for your pages. This gives you the flexibility to manage rows, columns and widgets in the footer. The following procedure shows you how to create a four columns footer plus a copyright line.
To create the footer
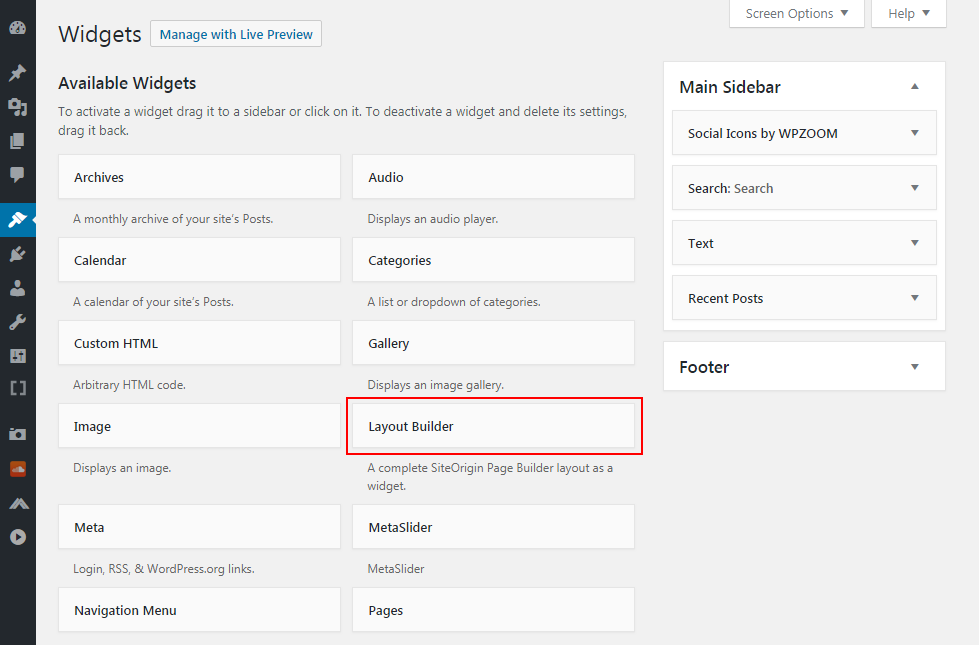
- Log into your WordPress site administration panel, navigate to Appearance > Widgets, then click on Layout Builder.

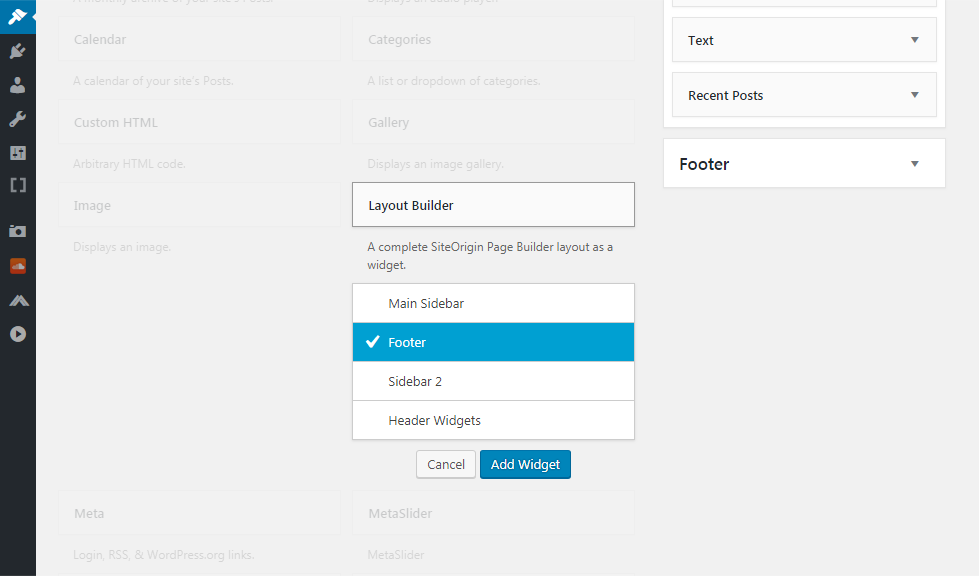
- On the Layout Builder drop-down list, choose Footer, then Add Widget.

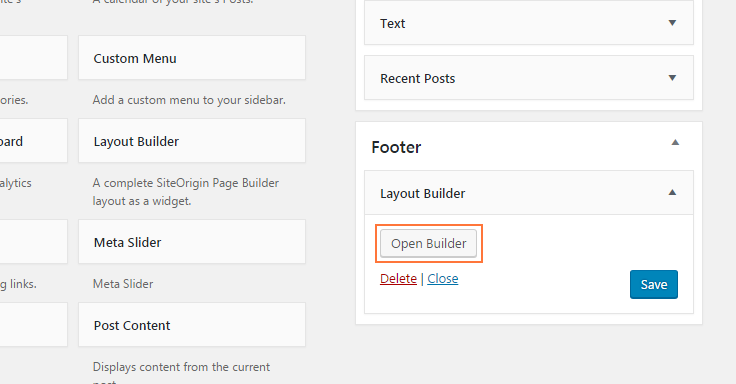
- Expand the Footer panel, then the Layout Builder, click Open Builder.

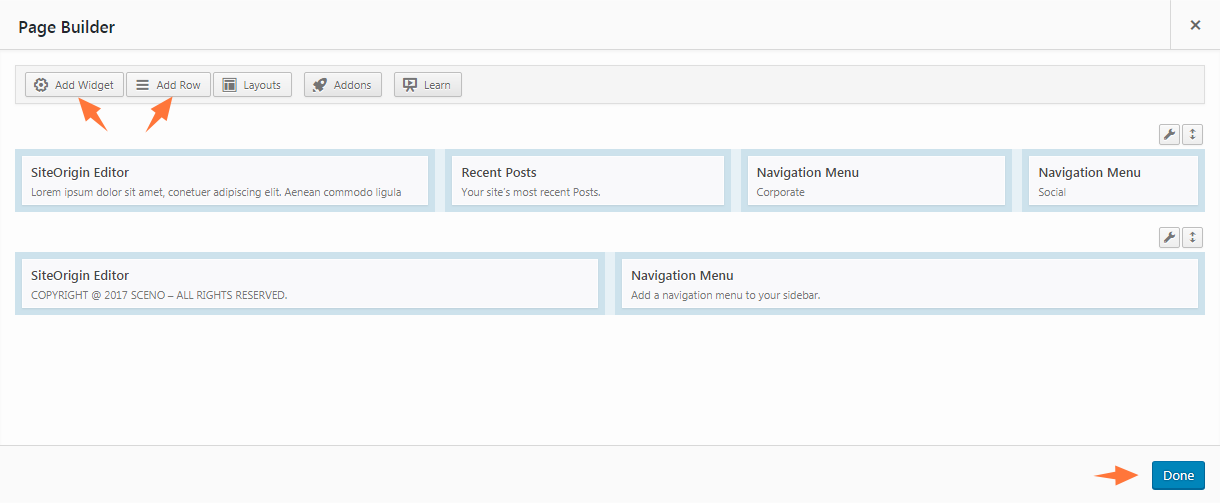
- In the builder panel, choose Add Row, then in the popup window, set the row to 4 columns.
- Add a widget to each column per your needs.
- Create another row with 2 columns, add a text/editor widget to the left column and enter your copyright information.
- Optionally, add a widget you need to the right column, in this example, add a Custom Menu.
NoteYou can adjust column width by moving the mouse cursor on to the gap between two columns, press down and drag it left/right.
