Mega Menus allow you to add multi-column drop down menus to your navigation with rich media such as images and videos. The following procedures show you how to easily add a mega menu to your site.
Prerequisites
This tutorial assumes that you have already created a navigation menu and set it the primary menu. For more information, see Creating the Primary Menu.
- Log into your WordPress site administration panel.
- Navigate to Appearance > Menus.
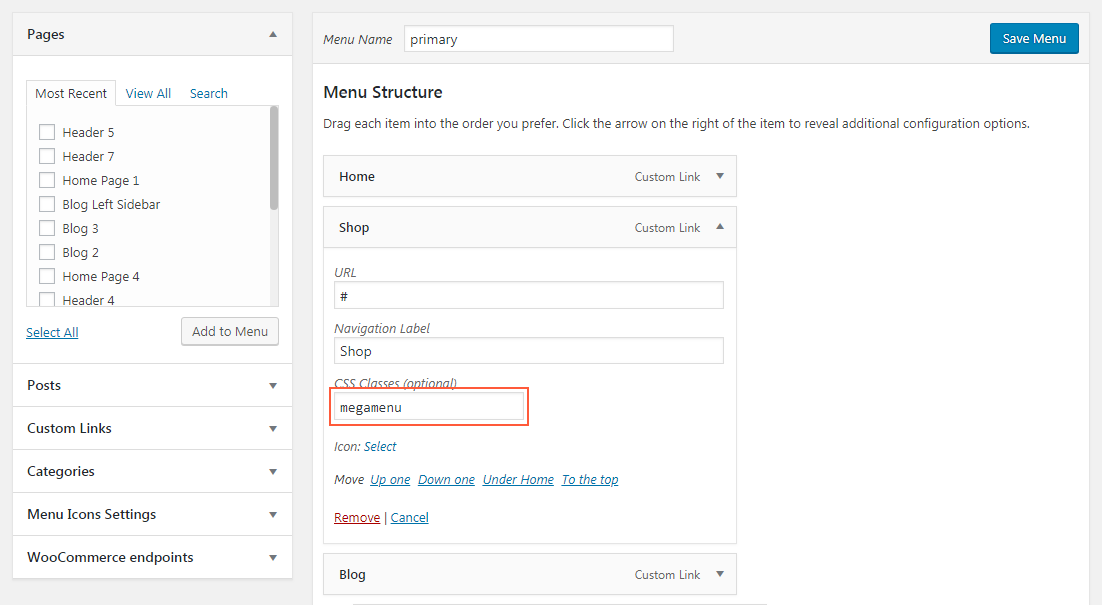
- In the Menu Structure panel, expand your menu item by clicking the arrow on the right.
- For CSS Classes, Type megamenu.
Important
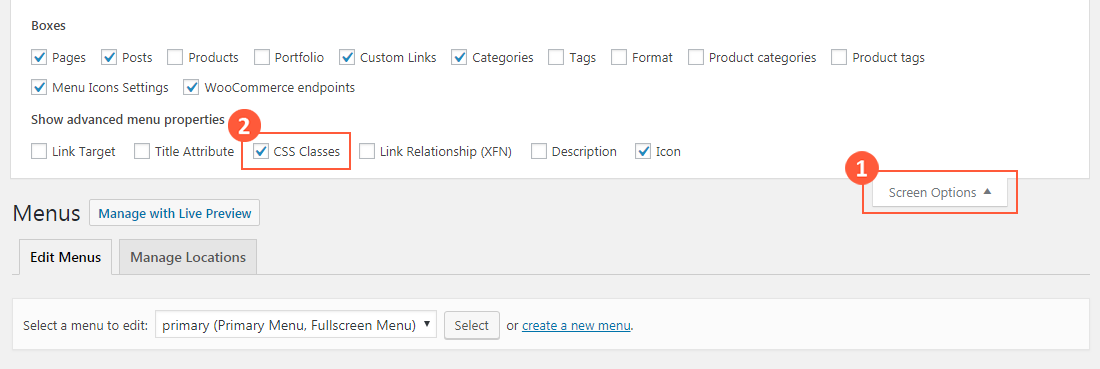
If you cannot see the CSS Classes field, click Screen Options on the top right of the screen, then tick CSS Classes.
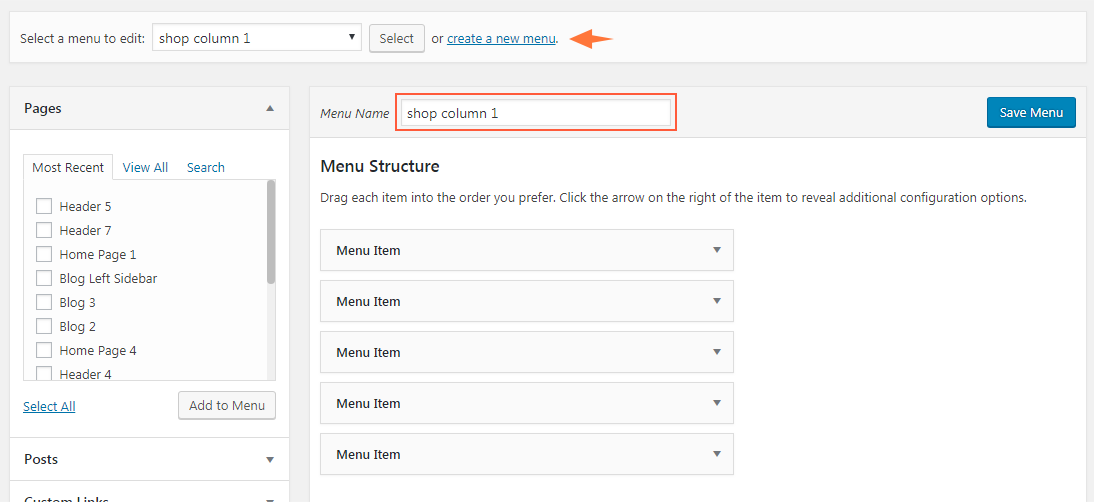
- Click create a new menu, type a name for the menu, in this example, type shop column 1, then click Create Menu.
- Add some menu items to the menu shop column 1, then click Save menu.
- Repeat the procedure to create two more drop-down menus, shop column 2 and shop column 3.
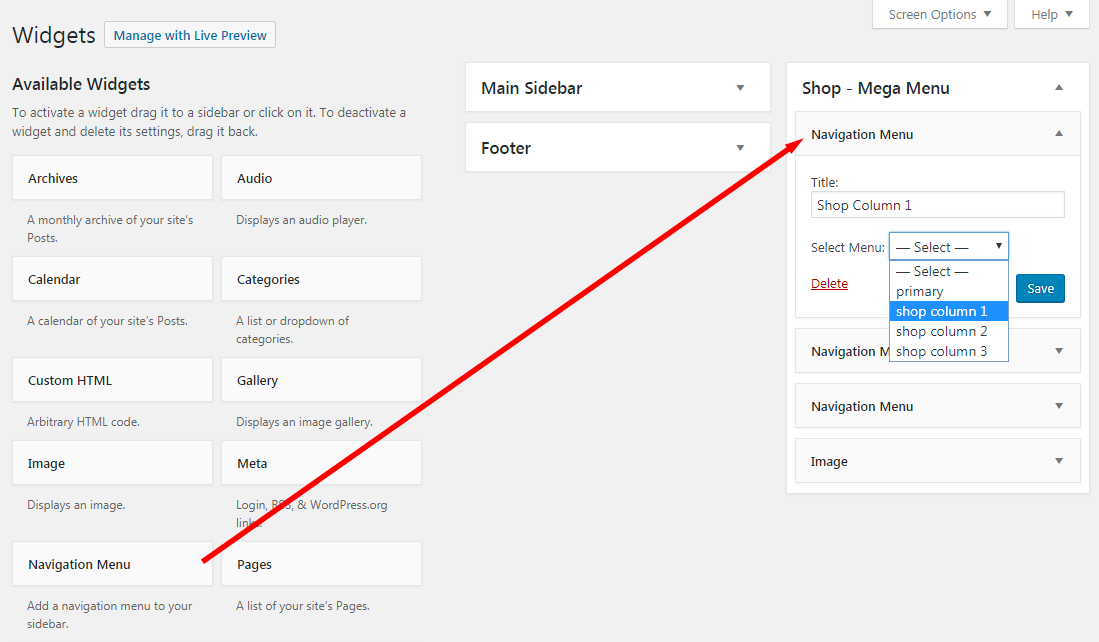
- Navigate to Appearance > Widgets, expand the mega menu panel created in previous step, in this example, expand Shop – Mega Menu.
- Under Available Widgets, choose Navigation Menu, add it to Shop – Mega Menu.
- In the settings panel of Navigation Menu, for Select Menu, select shop column 1.
- Repeat the procedure to add two more Navigation Menu and select menu shop column 2 and shop column 3 respectively.
- At last, add an Image widget, this will be the fourth column of your mega menu.


